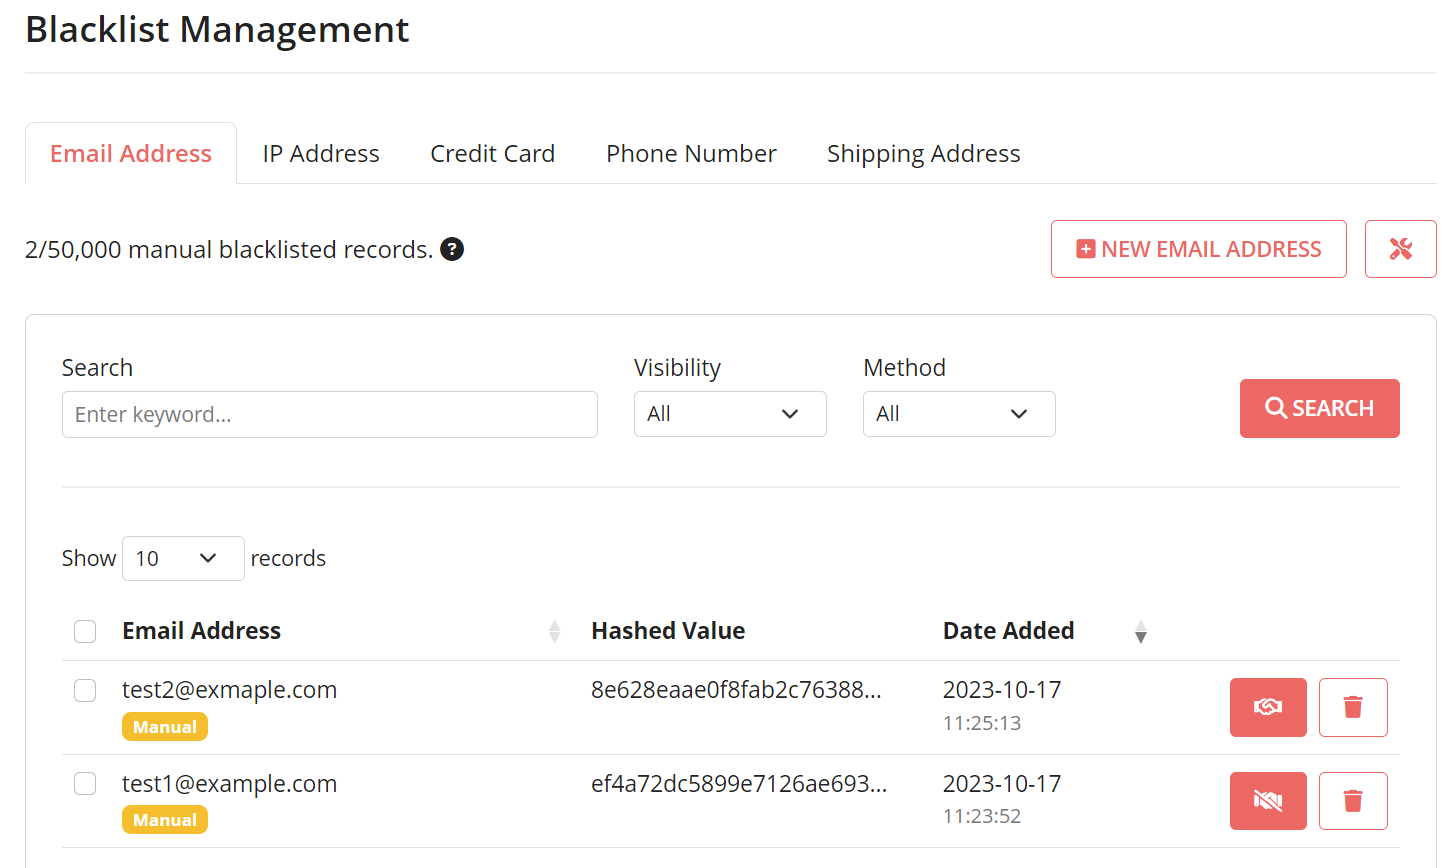
FraudLabs Pro has introduced a new feature allowing users to easily blacklist the unwanted clients, by using email addresses, IP addresses, shipping address and credit card numbers, from future purchase. This new feature is accessible via the merchant area under the Customers > Blacklist menu. Below is the screenshot of the Blacklist page.
Types of Blacklist #
There are 4 blacklist types supported in this feature, namely Email Blacklist, IP Blacklist, Shipping Address Blacklist and Credit Card Blacklist.
Users can now import a list of the blacklisted records for email address into the system, by simply click on the “+ New Email Address” button. Below is the input form for the blacklist (we use Email Blacklist for the below explanation).

Multiple email addresses can be entered into the blacklist in one shot. Just key in 1 email address per row into the text field and then click on the “Submit†button.
Blacklist Visibility #
For the blacklist visibility, users are given a choice if they want the blacklisted records to be marked as private or public. The difference between these two is that private records will only be used solely to validate the contributor’s own orders. However, for public records, this piece of blacklist information will be put into our public repository so that other merchants in the FraudLabs Pro network will be able to leverage these blacklisted records to protect them from fraud.
The public setting is highly recommended as these collaborative efforts will definitely help each other to effectively prevent fraud losses. We understand users may have concerns regarding their privacy if the blacklisted records are made public, but rest assured that the public records will not be visible to other merchants. These public records will only be used by the system during the validation process.
Besides adding to the blacklists, users may also view and search for the records that they had previously blacklisted. Users can also modify the visibility or delete their blacklisted records from the listing.
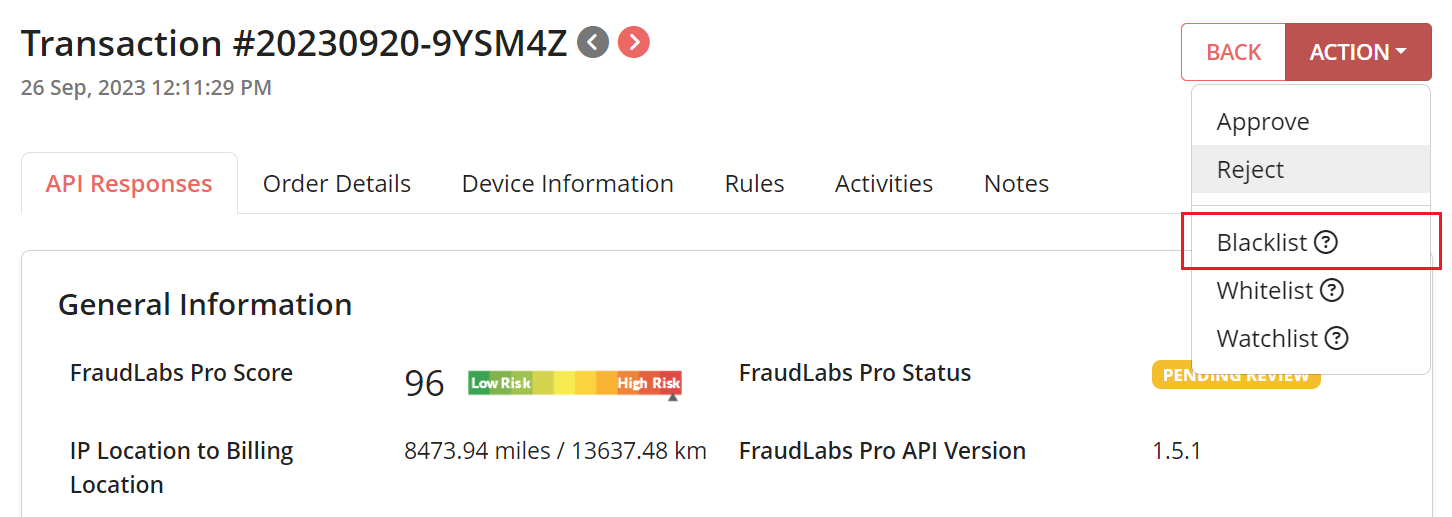
Blacklist A Transaction #
How about blacklisting a transaction that had been previously processed by FraudLabs Pro? Instead of having to extract the relevant bits of information, namely the IP address, email address and credit card number, there is one simple way to perform the blacklisting. To blacklist a transaction, just click on the Action > Blacklist at the transaction details page, then all the relevant records will be automatically extracted and added into the blacklist.
Free Fraud Protection Today! #
Start safeguarding your business with FraudLabs Pro Fraud Prevention at Zero Cost!