Credit card information is highly sensitive data and should be protected from unauthorized access. Due to this reason, it is understandable that neither the payment gateway plugin nor WooCommerce is going to expose this information to a 3rd party integrator, like us, to read and process, even for a very good reason – to perform the fraud validation.
Although we might not be able to retrieve the sensitive credit card information, there are information, for example Address Verification System (AVS) and Card Verification Value (CVV), which could be used for fraud validation. However, please take note that this information is only made available for certain countries, and you can visit Address Verification System to learn more. In this tutorial, we are going to show you about how to retrieve this information from Authorize.NET CIM payment gateway for fraud validation. It will involve some minor codes modification to the Authorize.NET plugin, and we will provide you step-by-step instructions on how to make the changes. Below are the modification needed:
$_SESSION['flp_avs'] = $this->get_avs_result();
$_SESSION['flp_cvv'] = $this->get_csc_result();
The above logic will retrieve the AVS and CVV result from Authroize.NET and save them into a session object for the fraud validation. Below are the steps to enable the fraud validation for the payment gateway.
Note: The following guide is based on WooCommerce Authorize.Net CIM Gateway version 2.6.1 with WordPress version 4.9.2. For other versions, the code placement may vary. You should consult your technical team for changes or email us for assistance.
- Get the WooCommerce Authorize.Net CIM Gateway at https://woocommerce.com/products/authorize-net-cim/.
- Edit the abstract-wc-authorize-net-cim-api-transaction-response.php file which is located in the wordpress/wp-content/plugins/woocommerce-gateway-authorize-net-cim/includes/api/transaction/ folder.
- Copy the code provided above and paste it 1 line after
public function transaction_approved() { - Copy the code provided above and paste it 1 line after
public function transaction_held() { - Done.
How to test if the AVS and CVV were correctly enabled?
In the following, we will show you the steps to test if the AVS together with FraudLabs Pro plugin was successfully configured and enabled.
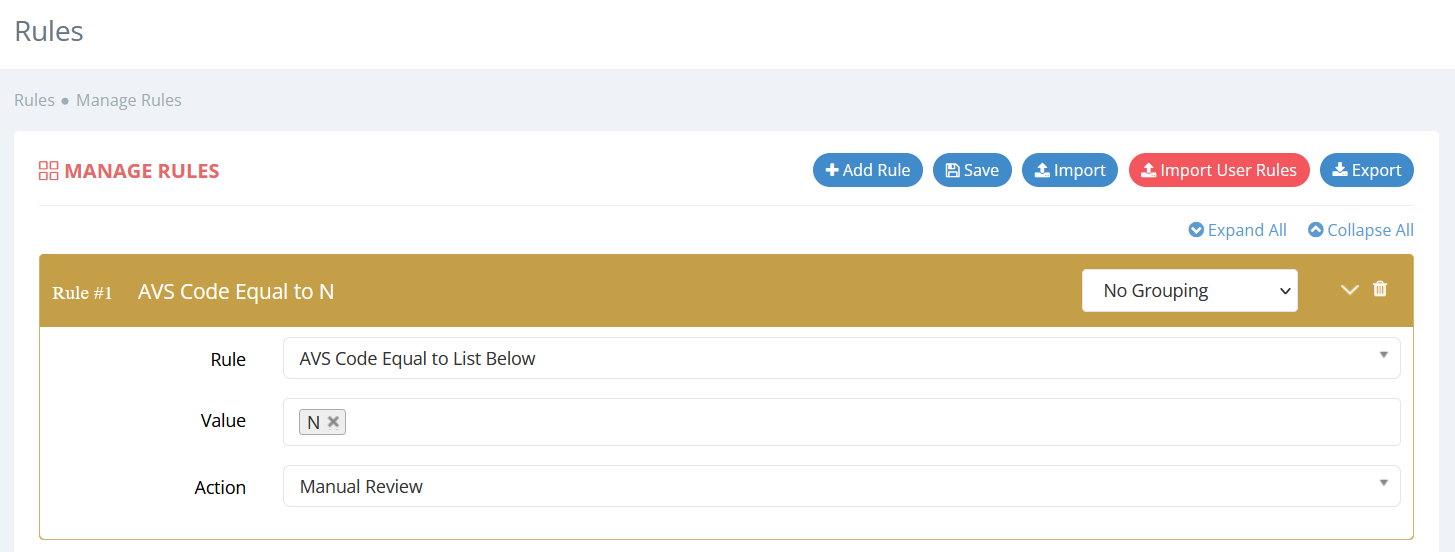
- Create a validation rule in FraudLabs Pro merchant area at https://www.fraudlabspro.com/merchant/rule.
- Set the Validate Order to “After submit order to payment gateway” in FraudLabs Pro plugin setting page.
- Purchase a product by adding it to cart and checkout from product page.
- In checkout page, enter the Billing and Delivery Details. Please make sure to enter street address and postal code that do not match those of the credit card, so that this will trigger REVIEW action as configured in the validation rule.
- Then, select Authorize.Net CIM as Payment Method and complete the checkout process.
- After you have placed the order, check on WooCommerce->Orders to view the order details. In this example, as shown in the following, status of order is set as “On hold” due to the transaction being under Review of fraud.

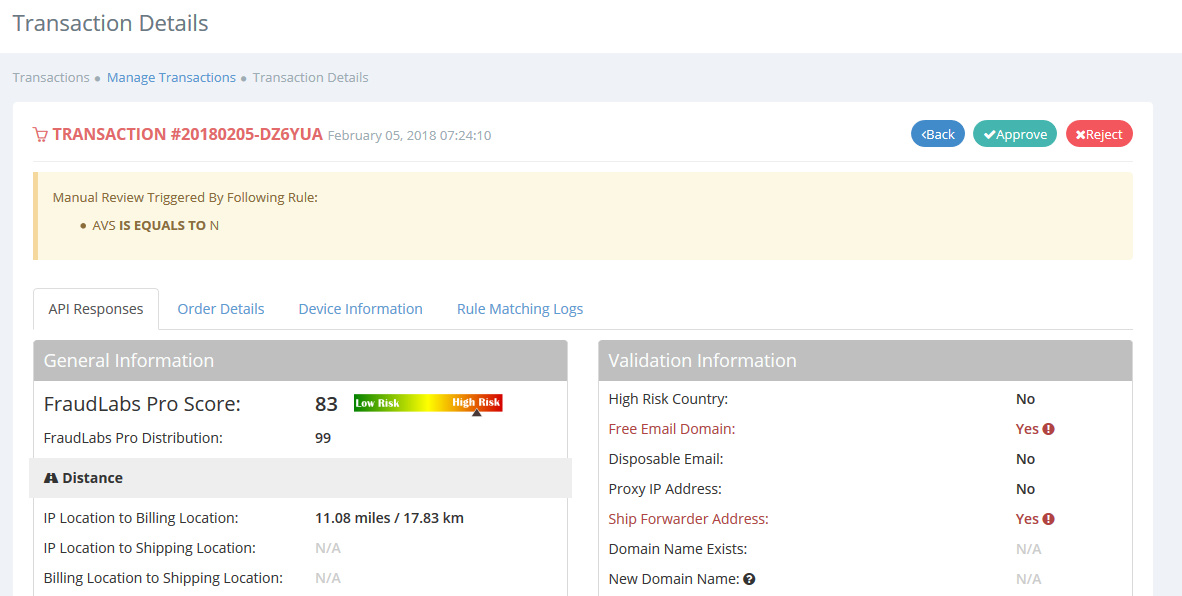
- In FraudLabs Pro transaction details page, the rule is being triggered as shown below.